Last Updated: October 23, 2026
Quick Summary
To improve indoor air quality after HVAC replacement, start by installing a MERV 8 to MERV 13 filter and changing it every 60 to 90 days, then verify duct sealing with a pressure pan or duct blaster test and clean the ducts, coil, and drain pan. Ventilate during post-installation off-gassing, add whole-house purification or UV germicidal irradiation if needed, and monitor indoor air quality while keeping static pressure in check.
- Change standard 1-inch filters every 60 to 90 days, and every 30 to 60 days in homes with pets, allergies, or heavy dust.
- Ask your installer for before-and-after CFM numbers from a duct blaster test as written proof that sealing worked.
- Run the thermostat fan on circulate for 20-30 minutes per hour to filter air without a full-time electricity draw.
- Keep indoor humidity between 30% and 50% to limit mold growth and other moisture-driven pollutants.
- Most residential blower motors are rated to move their design CFM at about 0.5 in. w.c. of total external static pressure.
Table of Contents
- Why a New HVAC System Can Leave Your Indoor Air Quality Unchanged
- Step 1: Replace the Filter With the Best HVAC Air Filter for Indoor Air Quality
- Step 2: Nail Down How Often to Change HVAC Air Filter Going Forward
- Step 3: Verify Ductwork Sealing and Clean the Ducts and Components
- Step 4: Tune HVAC Ventilation and Fresh Air for a Healthy Air Exchange Rate
- Step 5: Add a Whole-House Air Purifier for HVAC Systems and UV Germicidal Irradiation
- Step 6: Manage Post-Installation Off-Gassing and Source Control
- Step 7: Monitor Indoor Air Quality and Balance Energy Efficiency vs. IAQ
- Frequently Asked Questions
Why a New HVAC System Can Leave Your Indoor Air Quality Unchanged
A new HVAC unit moves air. It does not automatically clean it. That gap surprises a lot of homeowners, and it's the reason learning how to improve indoor air quality after HVAC replacement matters more than most people expect.
Indoor air quality (IAQ) is a measure of how clean and healthy the air inside your home is, based on the pollutants, moisture, and fresh-air exchange it contains.
Here's the part most guides skip: a new system often gets bolted onto old ductwork, and that ductwork carries years of dust, pollen, pet dander, and mold spores. The U.S. Environmental Protection Agency's indoor air quality guidance notes that indoor pollutant levels can run higher than outdoor levels, which is why the system around your equipment deserves as much attention as the equipment itself.
Below, we'll walk through seven steps that actually change the air you breathe.
Step 1: Replace the Filter With the Best HVAC Air Filter for Indoor Air Quality
Start with the filter, because it's the cheapest, fastest lever you have. The best HVAC air filter for indoor air quality is one rated MERV 8 to MERV 13: high enough to trap fine particulate matter, low enough to keep airflow unrestricted.
MERV rating is a score that tells you how well a filter captures particles, from 1 (barely anything) up to 16 (near-HEPA).
Here's what that means in practice:
- MERV 8: good everyday choice, catches pollen, dust mites, and most pet dander
- MERV 11-13: better for allergy sufferers and homes with pets
- MERV 14+: often too restrictive for a standard residential blower motor
A common mistake is buying the highest MERV filter on the shelf. That can raise static pressure, cut airflow, and make your new system work harder than it should.
For the full playbook on filtration, ventilation, and source control, see our guide on how to improve home air quality.
Step 2: Nail Down How Often to Change HVAC Air Filter Going Forward
Change your filter every 60 to 90 days for a standard 1-inch filter. Homes with pets, allergies, or heavy dust need a change every 30 to 60 days. Thicker 4- to 5-inch media filters can often go six to twelve months.
So how often to change HVAC air filter really comes down to three things: filter thickness, home conditions, and how hard the system runs. Write the change date on the filter edge with a marker. That one habit prevents the most common post-installation mistake we see, which is a brand-new system running on a clogged filter for a year.
If your system is new, our HVAC maintenance tips for new systems cover the upkeep routine that keeps the warranty and the airflow intact.
Filter change frequency depends on filter thickness and home conditions.
| Filter type or condition | Change frequency |
|---|---|
| Standard 1-inch filter | Every 60 to 90 days |
| Homes with pets, allergies, or heavy dust | Every 30 to 60 days |
| Thicker 4- to 5-inch media filters | Six to twelve months |
Step 3: Verify Ductwork Sealing and Clean the Ducts and Components
A new unit paired with leaky, dirty ductwork is the biggest reason air quality doesn't improve.
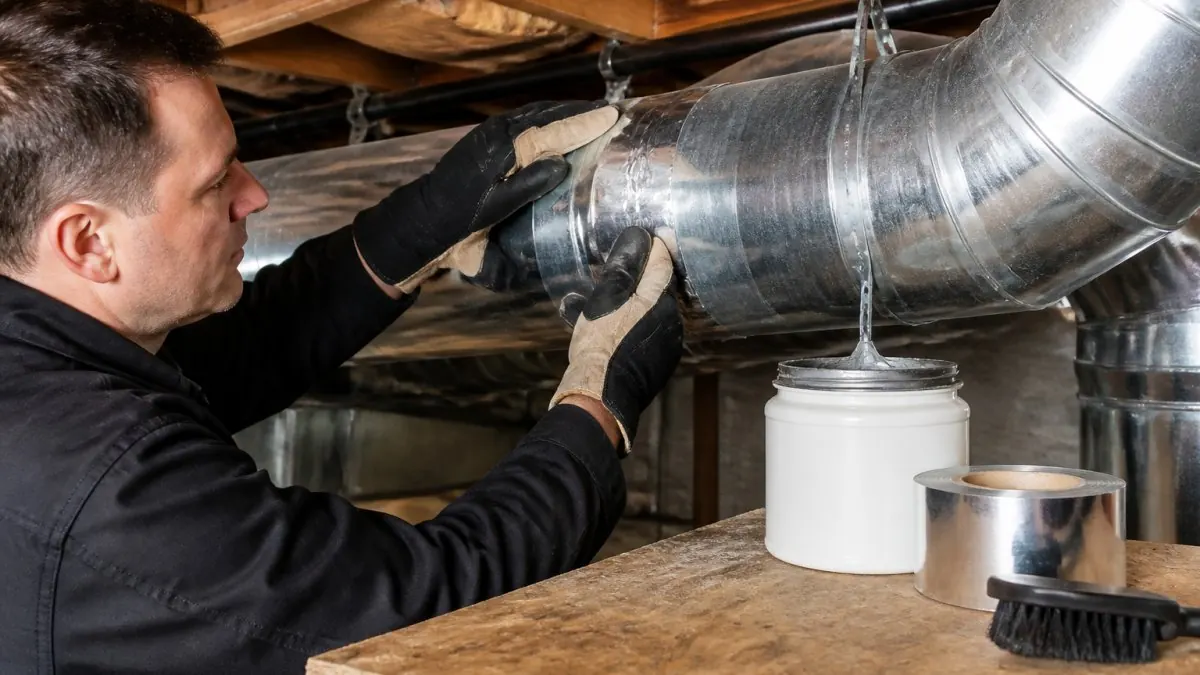
Start with verification, not cleaning. Ask your installer to perform a duct leakage test, not just a visual walkthrough. The two common methods are:
- Pressure pan test: A technician seals the supply registers, pressurizes the system with a calibrated fan, and measures leakage at each register with a pressure pan. Readings above roughly 0.5 Pa (pascals) at a register suggest a leak worth sealing.
- Duct blaster test: A calibrated fan mounts to the air handler and pressurizes the entire duct system to 25 Pa, then measures total leakage in cubic feet per minute (CFM). Many utility rebate programs and energy auditors use this method because it produces a single leakage number you can compare before and after sealing.
Ask for the before-and-after CFM numbers in writing. A reputable contractor will provide them, and they're the only objective proof that sealing actually worked.
What to inspect while the system is open:
- Mastic or foil tape on every joint, not cloth-backed "duck" tape (which dries out and fails within a few years)
- Sealed connections at the plenum, boots, and register boxes
- No disconnected runs in the attic or crawlspace
- No ducts routed through unconditioned space without insulation and a vapor barrier
Then have the ducts and components cleaned: the blower motor, evaporator coil, and drain pan all collect dust and moisture. A dirty coil grows mold spores and cuts system efficiency at the same time.
One more post-replacement detail: new duct sealant and mastic can off-gas for several days. Run the fan on "on" and ventilate the home during that window, then change the filter once the odor fades. We cover that sequence in Step 6.
Step 4: Tune HVAC Ventilation and Fresh Air for a Healthy Air Exchange Rate
Sealing your ducts doesn't mean sealing your house. You still need fresh air. HVAC ventilation and fresh air work together to hit a healthy air exchange rate, which is how often the air in your home is fully replaced.
Air exchange rate is the number of times per hour your home's entire air volume is swapped with outdoor or filtered air.
A few practical moves:
- Run the thermostat fan on "on" or "circulate" for 20-30 minutes per hour to keep air moving through the filter
- Open a window briefly during cooking or cleaning to flush volatile organic compounds (VOCs)
- Make sure the fresh air intake isn't blocked by shrubs, snow, or stored boxes
Homes built tight for energy efficiency often need mechanical ventilation to hit a healthy exchange rate (HVAC Whole-House Ventilation). Without it, carbon dioxide levels climb and the air feels stuffy.
Step 5: Add a Whole-House Air Purifier for HVAC Systems and UV Germicidal Irradiation
If filtration and ventilation aren't enough, a whole-house air purifier for HVAC systems is the next step up.
Pair it with UV germicidal irradiation. UV lamps installed near the coil and drain pan kill airborne pathogens and stop mold from growing on wet surfaces.
The one drawback: these add-ons need correct sizing and placement. A poorly installed purifier can restrict airflow or underperform. If you want purification or UV equipment installed right, you can schedule service with our team.
Step 6: Manage Post-Installation Off-Gassing and Source Control
New equipment and new duct sealant can release odors for days or weeks. This is called off-gassing, and it's the angle almost no guide covers.
Off-gassing is the release of volatile organic compounds (VOCs) from new materials, sealants, and components into your indoor air.
To manage it:
- Ventilate heavily for the first week after installation
- Run the fan continuously and change the filter once early
- Air out new furniture, paint, and sealants before bringing them inside
Source control is the other half. Stop pollutants before they enter the air:
- Store cleaning chemicals in sealed containers away from living spaces
- Fix leaks fast to prevent mold spores from taking hold
- Use a range hood vented outdoors when cooking
- Keep humidity levels between 30% and 50% (the EPA)
Step 7: Monitor Indoor Air Quality and Balance Energy Efficiency vs. IAQ
You can't fix what you can't see. An air quality monitor tracks particulate matter (PM2.5 and PM10), VOCs, carbon dioxide, and humidity in real time, so you know whether your steps are working.
Then comes the trade-off nobody likes to talk about: energy efficiency vs. IAQ. A tightly sealed home saves energy but traps pollutants. A high-MERV filter cleans better but restricts airflow.
Static pressure is the resistance to airflow inside the duct system, measured in inches of water column (in. w.c.).
The balance most homes land on:
- MERV 11-13 filtration with a correctly sized blower and a media cabinet rather than a 1-inch slot
- Fan on "circulate" rather than constant "on" (circulate runs the fan in scheduled bursts, typically 20-30 minutes per hour, which filters air without the full-time electricity draw)
- A smart thermostat that ties fan runtime to occupancy and outdoor air quality
- A static pressure check after any filter upgrade, so you know the new filter didn't choke the system
Smart home integration for IAQ takes this further.
Our team can help local homeowners with monitoring, maintenance, and efficiency. For a complete look at local service options, see our NJ HVAC service guide.
Frequently Asked Questions
Can a new HVAC system make indoor air quality worse?
It can, at least temporarily. A new unit paired with old, dirty ductwork can push dust, mold spores, and particulate matter through the house. New equipment also goes through off-gassing, where volatile organic compounds (VOCs) release from sealants, insulation, and components for the first few weeks. Ductwork sealing that was disturbed during the swap can leak air from unconditioned spaces. Running the blower fan with a fresh MERV-rated filter and airing the house out usually clears the worst of it within two to four weeks.
How often should I change the air filter after HVAC replacement?
Check the filter at 30 days after installation and replace it if it looks gray or matted. After that, a 1-inch filter typically needs changing every 30 to 90 days, while a 4- to 5-inch media filter can last six to twelve months. Homes with pets, pollen season, or heavy occupancy sit at the short end of that range. A clogged filter raises static pressure, restricts airflow, and forces the blower motor to work harder, so err on the side of changing sooner.
Does an HVAC replacement improve ventilation on its own?
Not by itself. A standard replacement keeps the same duct layout and returns, so the air exchange rate stays about the same. To get real fresh air intake, you need a dedicated outdoor air path, an energy recovery ventilator, or a system designed to bring in outside air. If the house feels stale after the install, ask your contractor whether a fresh air intake or ERV makes sense for your layout and climate before assuming the new unit is at fault.
What should I check if my indoor air still feels dusty after installing a new HVAC system?
Start with the filter: confirm the MERV rating and that it is seated correctly with no bypass gaps. Next, inspect accessible duct joints for separated seams or missing mastic, since leaky return ducts pull dust from attics and crawlspaces. Check that all supply registers are open and unobstructed. Then look at humidity levels; anything above 60% lets dust mites and mold spores thrive. If dust persists after those checks, request an air quality monitor reading and a duct inspection.